

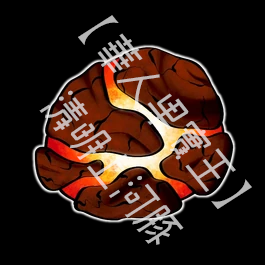

Category Devil Fruit Guides
Stage All stages (pick maps that match your level)
PVE PVP Raids Fruit farming
Updated: 2026-10-22
← Back to Fruit Overview
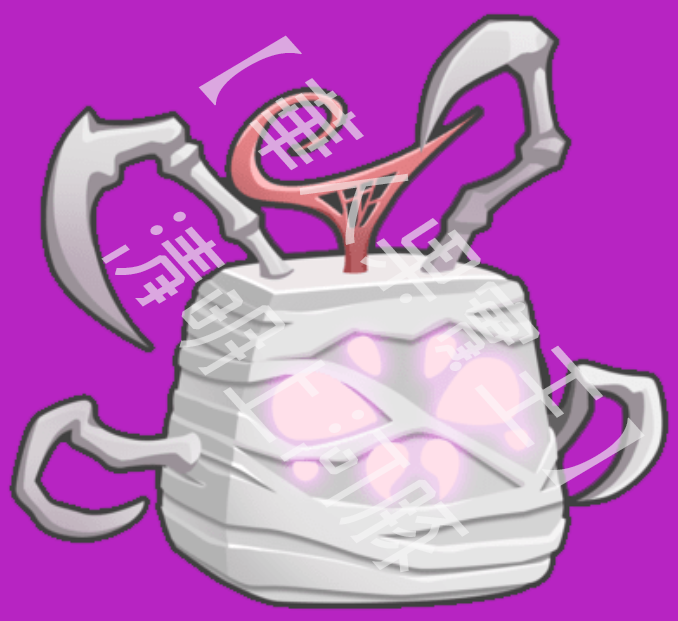
Pain

Pain Fruit Guide

Natural Legendary 🔥 High Risk, High Reward 🩸 Second Life: Last Stand
Formerly the Paw fruit. The reworked Pain is all about “build up pain → unleash it”: taking damage charges the Pain Meter, and Pain Ghosts make you stronger; when your HP hits zero, Last Stand triggers, greatly boosting your damage and damage reduction and shortening cooldowns for a short time, but you can only use fruit moves.
✅ 3 things to remember:
① Taking damage + absorbing ghosts = fill the Pain Meter and get stronger.
② When your HP hits zero, you enter “Last Stand”, a second life, but once the energy runs out you go down for good.
③ This fruit doesn't use the traditional Raid awakening; instead, the Admin Panel upgrades its moves into their complete versions.

📍 1. How to Get & Role

  • Rarity: Legendary
  • Type: Natural
  • Shop price: $2,300,000 Beli / 2,200 Robux
  • Obtainment: buy it from the Blox Fruit Dealer, roll it from the Blox Fruit Gacha (the First Sea gacha moved to Middle Town after Update 30), or pick it up when it spawns randomly on the map (physical fruit).
  • Old name: Pain used to be Paw; old Paw skill data doesn't apply to the reworked Pain's skills.
  • Features: Has M1 (a normal attack combo), a “second life” called Last Stand, and can be upgraded through research in the Admin Panel.
In one sentence:
This is a “the more it hurts, the stronger you get” fruit: getting hit makes you stronger and you explode with power when you're close to death, great for players who like to fight up close and know how to manage distance.
  • PvP: A–S tier (high damage, has control, and Last Stand often lets you turn the fight around)
  • Leveling: B tier (has wide AoE, but high Mastery requirements; awkward early on)
  • Difficulty: High (moves have tap and hold versions; aiming and timing matter a lot)

🧠 2. Core Mechanics (Must Read)

(1) Pain Meter

  • Taking damage builds the meter; absorbing Pain Ghosts also adds to it.
  • When it's full, you “burst”: more M1 damage, shorter skill cooldowns and faster movement (lasts about 1 min).
  • Tip: charging is based on your current HP percentage, so getting hit when you're low on HP fills it faster.

(2) Pain Ghosts

  • When Z, X, held C or held F misses, it spawns Pain Ghosts.
  • You can absorb the ghosts: they charge your meter and instantly reset the cooldown of your movement skill F “Torment Warp”.
  • When ghosts touch an opponent, they always break Instinct; without upgrades they only home in over a short distance, but after you complete Tier 3 research “Torment Conductor”, ghosts left by tapped Z will actively chase enemies and deal damage.

(3) Last Stand: A Second Life

  • When your HP hits zero, you enter Last Stand: 60% damage reduction, 60% shorter skill cooldowns and nearly double M1 damage, plus faster movement and charging.
  • But: during Last Stand you can only use Pain fruit moves, and once it starts you can't activate your Race Awakening (V4).
  • Official Balance Patch 001: When it activates, your HP resets to full, then keeps draining for the rest of Last Stand; you can't be healed during it and you stay in combat the whole time.
  • Defeating another player during Last Stand ends it immediately and resets the meter to 0; defeating NPCs doesn't trigger this.
  • Lasts 30 seconds base; extended to 60 seconds after the first research upgrade.
  • When the meter runs out, you go down immediately; if the final blow comes from seawater, the second life won't trigger. Finishing moves such as Dragon Talon's Z and Shadow's C, as well as the electric shock from the Cyborg V3 Energy Core, also bypass the second life.
⚠️ The most common beginner mistake:
You're using Pain but put all your stat points into Sword/Gun/Melee. Then in Last Stand you can only use fruit moves, your damage is low, and you get finished off fast.
Focus on fruit damage so you can make the most of Last Stand's moves.

💥 3. Skills and Tap/Hold Differences

Key Skill name Requirements Key Notes
M1 Raging Rush 1 Mastery Rush in with punches and an uppercut, then finish with an energy combo that knocks the target away. During Last Stand, its range, speed, damage and stun all increase.
Z Fury Jab Mastery 1
Cooldown 7.5s / Energy 40
Tap: Fires a ghostly energy shot that explodes on contact with players or terrain.
Hold: Fires multiple ghosts in a row (slowing down as you go).
Breaks Instinct: on a direct hit.
X Rage Release Mastery 100
Cooldown 12s / Energy 60
Tap: Dash forward, grab the target for a short combo, then blast them away.
Hold: Dash, grab and rise with the target, then fire an energy beam that “drags” them to where you're aiming (the final part breaks Instinct).
C Agony Nuke Mastery 200
Cooldown 18.5s / Energy 80
Tap: Throws a fast energy orb that pulls in nearby enemies and then explodes.
Hold: Charge up and release a huge ghostly beam with a strong pull + stun (requires the Spectral Assimilation research).
Breaks Instinct: a direct hit from the tapped orb can't be dodged, and the beam always breaks it once it catches you; the outer edges of both can still be dodged.
V Torturing Pulse Mastery 300
Cooldown 25s / Energy 100
Tap: Throws a big energy orb; on hit it deals damage over time + distorts vision (single target).
Hold: The orb gets bigger and drags targets along on hit (larger area, multiple targets).
Breaks Instinct: including the damage-over-time ticks.
F Torment Warp Mastery 50
Cooldown 6.5s / Energy 20
Tap: A long-range dash (great for escaping and chasing). Absorbing a ghost instantly resets its cooldown.
Hold: Jump up, dash toward your cursor and slam down in an explosion (requires the Agony Surge research; spawns 4 ghosts).
Breaks Instinct: the held slam explosion does.
Quick combo (super simple):
Use [F] to reposition and find an angle → catch the opponent with [V] or [C] → follow up with [X] → finish with [Z].
(If you've done the research upgrades, held F and held C get even stronger.)

4. How to Upgrade Pain: 4 Research Tiers and Materials

It's not a Raid awakening. Talk to the Mysterious Scientist, open the Admin Panel and complete the research, then craft the upgrade with materials and equip it. Tier 1 starts at Mastery 200, and finishing everything requires Pain Mastery 500.

Crafting all four tiers from scratch

How Much Do You Need in Total?

Doesn't include buying the fruit, potions or tiers you've already crafted. Nightmare Catchers are materials for Tiers 3 and 4; Tiers 1 and 2 don't need them.

Calculate missing materials for all four tiers →
First Time Researching? Mysterious Scientist Location and Steps
  • Second Sea, Hot and Cold: Enter the lab in the ice area, unequip everything, then set the color panels to red → blue → green → blue; once the door opens, follow the passage upstairs.
  • Third Sea, Castle on the Sea: Find the Mysterious Scientist near the left side of the Set Home Point.
  1. Equip Pain, then choose Admin Panel in the dialogue, not Raid chips.
  2. Check that tier's research and meet the Mastery and quest requirements; go by the in-game panel for research progress.
  3. Go back to the panel, hand in materials to Craft, then Equip the upgrade.
See the full Admin Panel process →
Tier 1 · Mastery 200

Infernal Endurance

Extends Last Stand's base duration from 30 to 60 seconds.

Research quest

Walk on lava for a total of 5 minutes.

Crafting cost for this tier

Common sticking points

The community Wiki suggests doing this at Hot and Cold after drinking a Lava Potion. Check your HP and the potion effect first, then keep an eye on research progress; don't assume just standing still counts.


Calculate Tier 1 only →
Tier 2 · Mastery 300

Agony Surge

Unlocks the held F slam explosion attack.

Research quest

Absorb 5 Pain Ghosts at once with F Torment Warp; do it 10 times.

Crafting cost for this tier

Common sticking points

The key is absorbing 5 with a single F, not collecting 50 over several uses. Let missed moves leave ghosts behind first, then line up your F.

Calculate Tier 2 only →
Tier 3 · Mastery 400

Torment Conductor

Pain Ghosts left by tapped Z home in on enemies.

Research quest

Defeat a player using the Lightning fruit.

Crafting cost for this tier

Common sticking points

Make sure the opponent is actually using the Lightning fruit; Electric Fighting Styles or electrified weapons don't count.

Calculate Tier 3 only →
Tier 4 · Mastery 500

Spectral Assimilation

Unlocks C's held beam version.

Research quest

Absorb a total of 200 Pain Ghosts.

Crafting cost for this tier

Common sticking points

This tier counts your total absorbed ghosts, which is a different requirement from Tier 2's 5 at once, 10 times. When you're done, go back to the panel and check your craft and equip status.

Calculate Tier 4 only →
Already finished the first two tiers?The last two tiers need 15,500 Fragments, 4 Nightmare Catchers and 10 Ectoplasm in total; you don't pay for the first two again.
Calculate only Tiers 3 and 4 →

Research FAQ

Do you need Mastery 500 to start?

No. The four tiers require 200, 300, 400 and 500 in order; just check the tier you want to craft, no need to reach 500 for the first tier.

I have enough Fragments, so why can't I upgrade right away?

You also need to complete that tier's research, gather the required materials and craft it in the Admin Panel. After crafting, make sure the upgrade is equipped; just saving up Fragments doesn't unlock the skill.

Are there two different Nightmare Catcher materials?

No. You may see different translated names, but they all refer to the same Nightmare Catcher. This site's material list uses the official name, and so does this page.

Research requirements and costs checked: 2026-10-07. References: Blox Fruits Wiki: Pain upgrades and Admin Panel; the Wiki is community-compiled, not an official announcement. Images use this site's existing in-game item icons.

🎮 5. Practical Tips (PvP / Leveling / Stats)

Simple PvP game plan

  • Stay alive first: You don't one-shot people; you get stronger through the Pain Meter. Use F to reposition and dodge skills first.
  • Once you catch them, go all in: Land V or C first → follow up with X → add damage with Z.
  • Last Stand is your comeback button: Once it triggers, make the most of the time to fight back; if you can't finish the opponent, use F to create distance (absorbing ghosts resets F).

Leveling tips

  • Pain has high Mastery requirements, so it feels awkward in the First Sea and early Second Sea.
  • Once you have at least X (100), C (200) and V (300), clearing mobs gets much smoother.

Stat build (super simple version)

  • Fruit main: Invest mainly in Blox Fruit and Defense, and keep some points in Melee to raise your max Energy.
  • Hybrid: If you want to main a Sword/Gun, still keep some points in Blox Fruit, since during Last Stand your only damage comes from Pain moves.
In short:
Pain is a high-risk fruit that “hits back after taking damage and gets a second life when near death”; master the Pain Meter and using ghosts to reset F to unlock its full strength.

📚 Sources & Check Date

On 2026-10-22 (after Update 30), this page rechecked the price, rarity, skill names, Mastery, the four research tiers' requirements and crafting costs, and the Last Stand changes; Update 30 didn't change Pain's skills. Last Stand is a fruit passive, not an awakening unlocked through Raids.

Official LINE